KubeHat Project Software Setup
The clusterhat website provides custom Rasbian images for both the controller and Zero devices, that includes:
clusterhatutility to control power/hub to the Zeros via i2c.- Networking setup for brudge/NAT so all devices can connect to the network via the ethernet port on the controller.
- Hostnames for
controller,p1,p2, etc as well as avahi setup so you can easily SSH top1.localetc from your local machine.
The custom images do not enable sshd automatically, and since I'm only ever going to have this cluster networked, and to avoid having to fiddle with HDMI cables, before copying the images to the SD cards, I mounted each image and added the /boot/ssh file as normal. You could get away with only enabling sshd on the controller, and accessing the Pi Zeros via the serial console if you'd rather do that.
Once you have the images copied to the SD cards and they are inserted to all the Pis, you can power on the controller. From there, assuming you've set up mDNS resolution on your local machine (macOS has this OOTB, many Linux distros as well), you can SSH into your controller using the password clusterhat:
$ ssh pi@controller.local
Once in the controller, you'll likely want to do to raspi-config --expand-rootfs to expand the partitions to use the whole SD card before continuing. Once that is done and you've restared the controller Pi, you can ssh back in and use the following command to power on the Pi Zeros:
pi@controller$ clusterhat on
After that, you should see the status lights for the Zeros illuminate, and running dmesg should show various USB gadget devices showing up, along with their network adapters, and tty devices for serial console connections.
Pi Zero Access
If you didn't enable SSH on the Zeros. then you can access the serial console on the TTY devices from the controller, e.g. ttyACM0, using screen:
pi@controller$ apt-get install screen
pi@controller$ screen /dev/ttyACM0
p1 login:
Alternately, you can just ssh into the Zeros using the mDNS name, e.g. p1.local:
$ ssh pi@p1.local
pi@p1.local's password:
T-Mux Synchronization
A note about performing the same steps on all the Pi Zero devices in the cluster. Leveraging tmux's ability to synchronize a set of panes makes performing bulk operations on all devices a breeze. In a nutshell, I use the following process whenever I need to do the same actions on all four Zeros:
- SSH into the
controller - Run
tmux(install this first w/apt-get install tmux). - Use
C-b "andC-b %to open four panes,C-band the arrows to navigate as needed. - Use
C-b+ arrow keys to switch to each pane, and SSH into each Zero, or start up screen sessions on each TTY device. - Once all four devices are at the same state, with an active logged in session, use
C-b :set synchronize-panes<Enter>. - Now, anything typed into tmux, pasted, etc will be sent to all four Pi Zero sessions, such as running dist upgrades, installing packages, editing files, etc.
- Once you're done, you can do
C-b :set synchronize-panes off<Enter>to stop synchronizing.

Expand Partitions
Similar to the controller, you'll want to expand the root filesystem for the Zeros. Setup the synchronized tmux sessions as described above, then run raspi-config --expand-rootfs. Once completed, reboot the Zeros to complete the process.
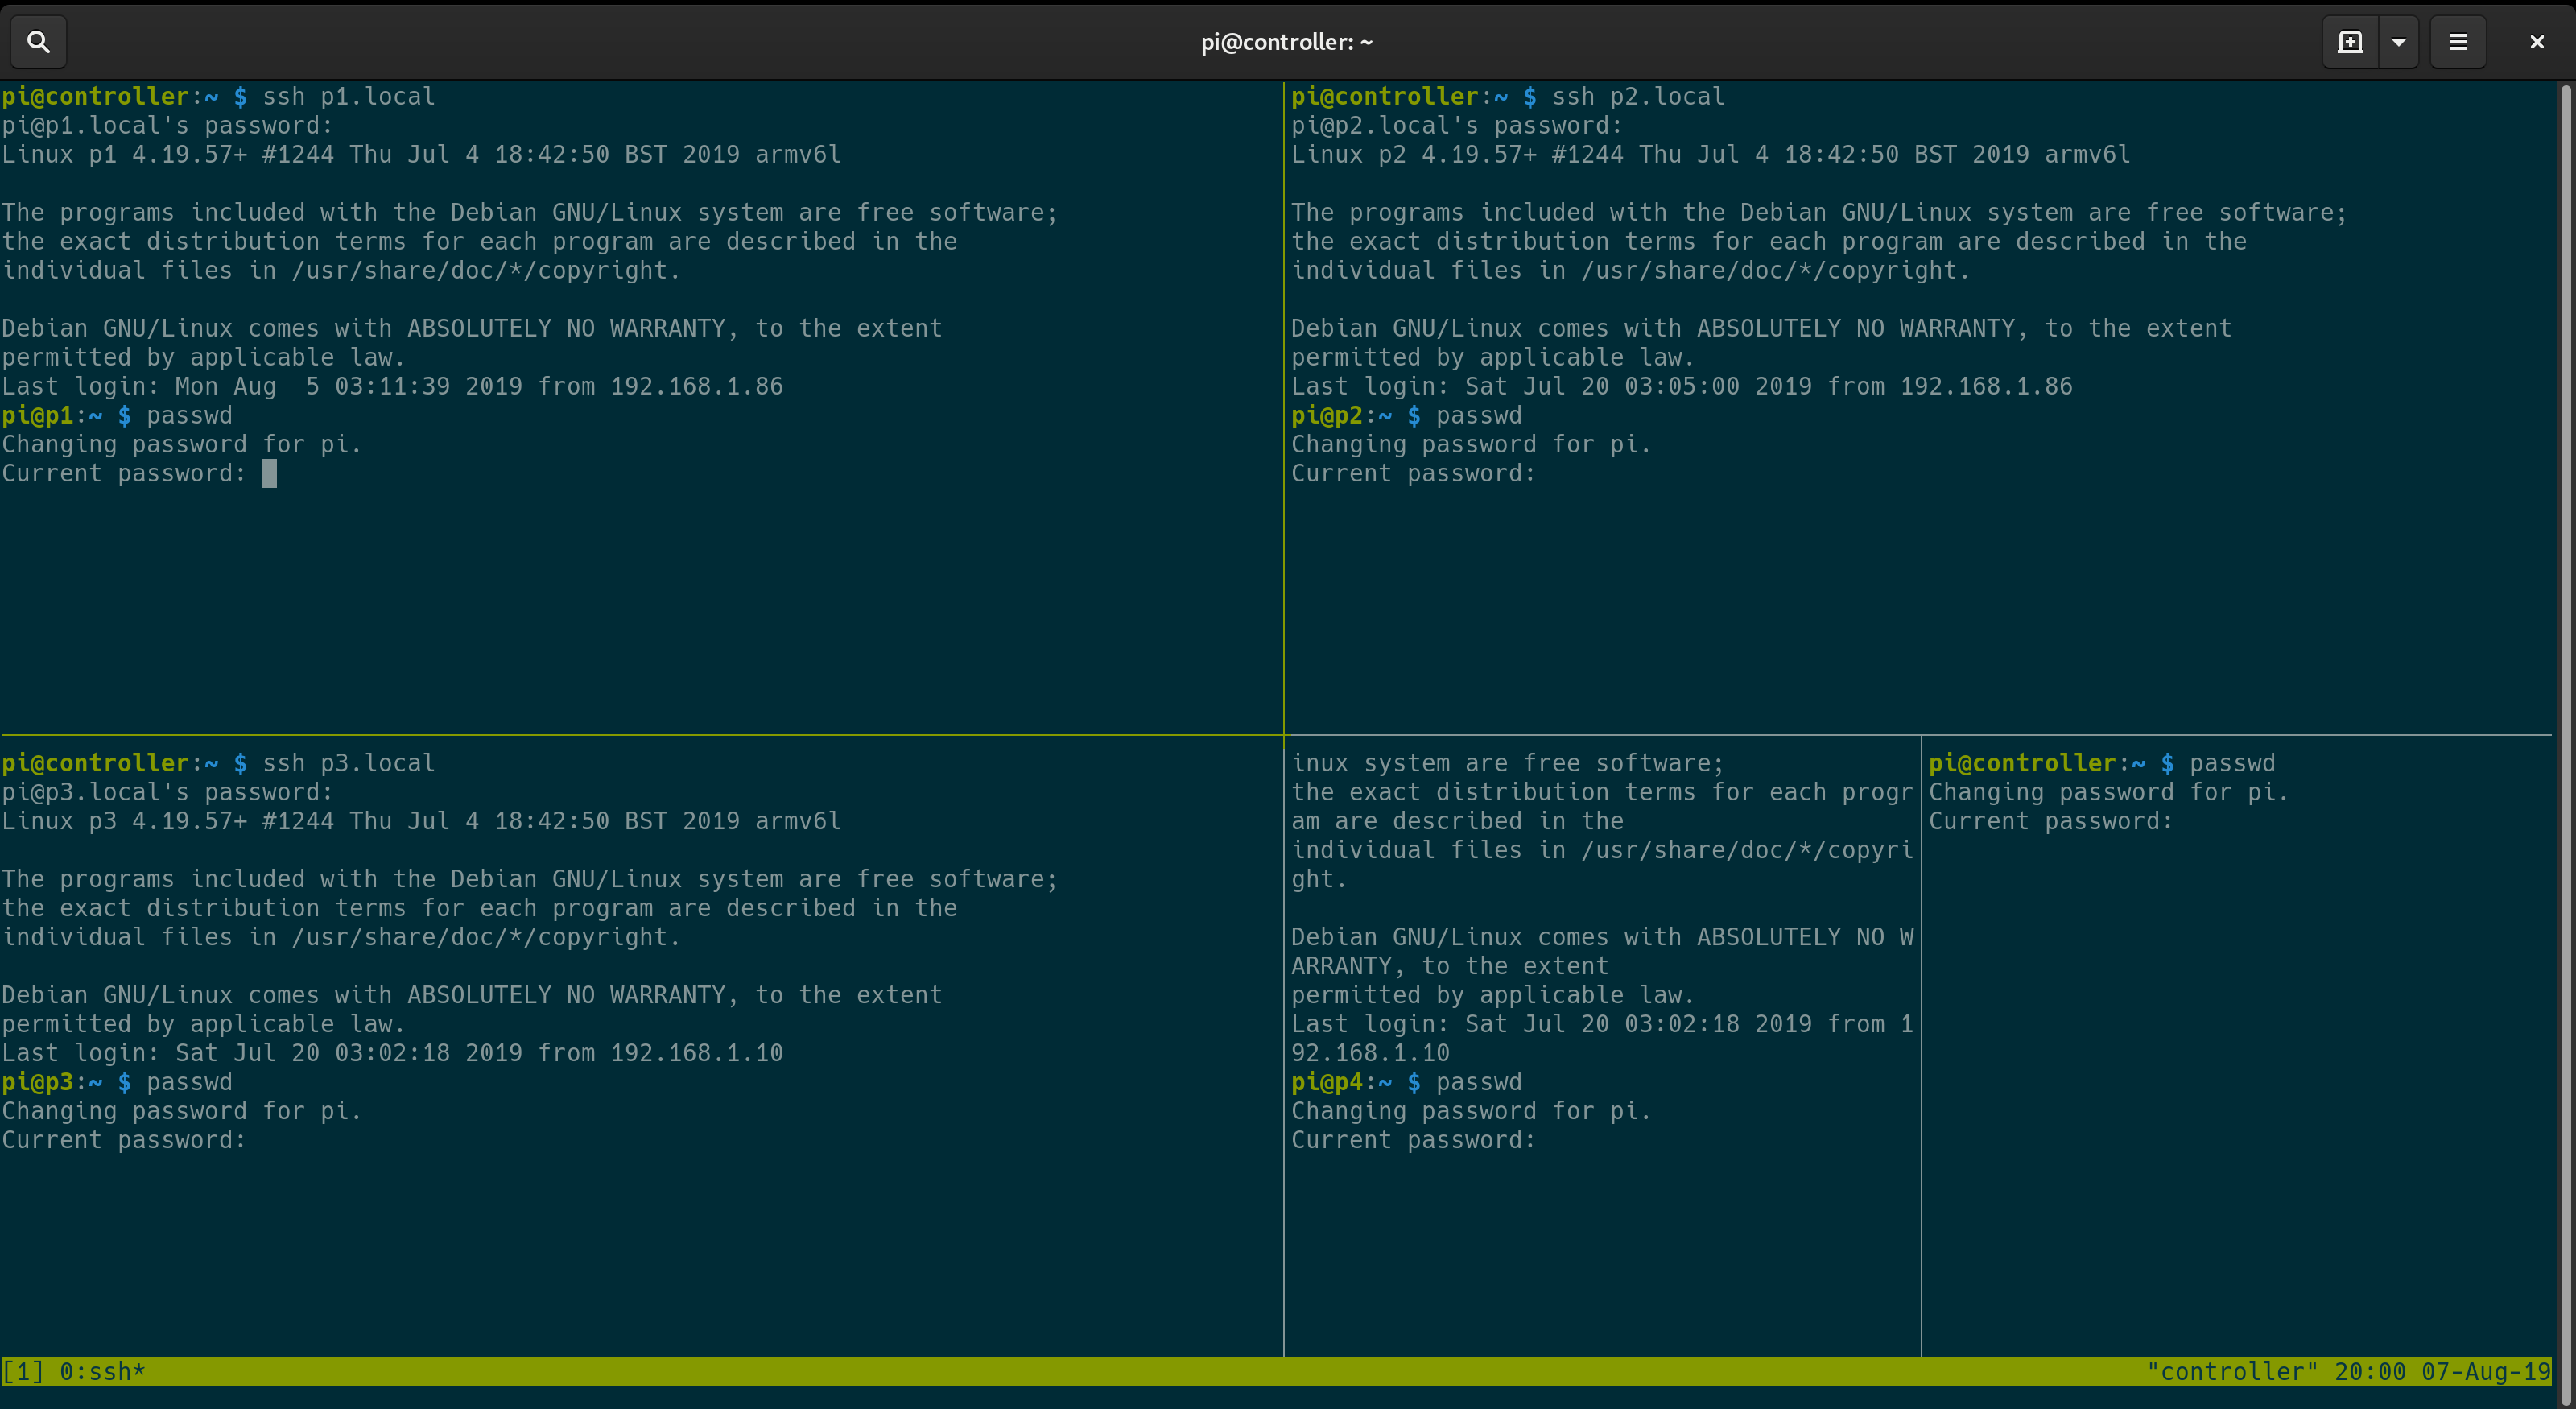
Password Update For pi User
For the controller, and for any of the Zeros that have SSH enabled, you'll want to change the default pi user password. Using tmux to multiplex the following steps to all the devices, including the controller, if you want:
Next Steps
Next post, I'll dive into my efforts to get the dependencies for running Kubernetes installed for the controller Pi, and the armv6-based Pi Zeros, which present a challenge since many packages build for Debian/Ubuntu are armv7-compatible only.