Cluster Triple - A new Kubernetes cluster attempt
Cluster Triple Intro
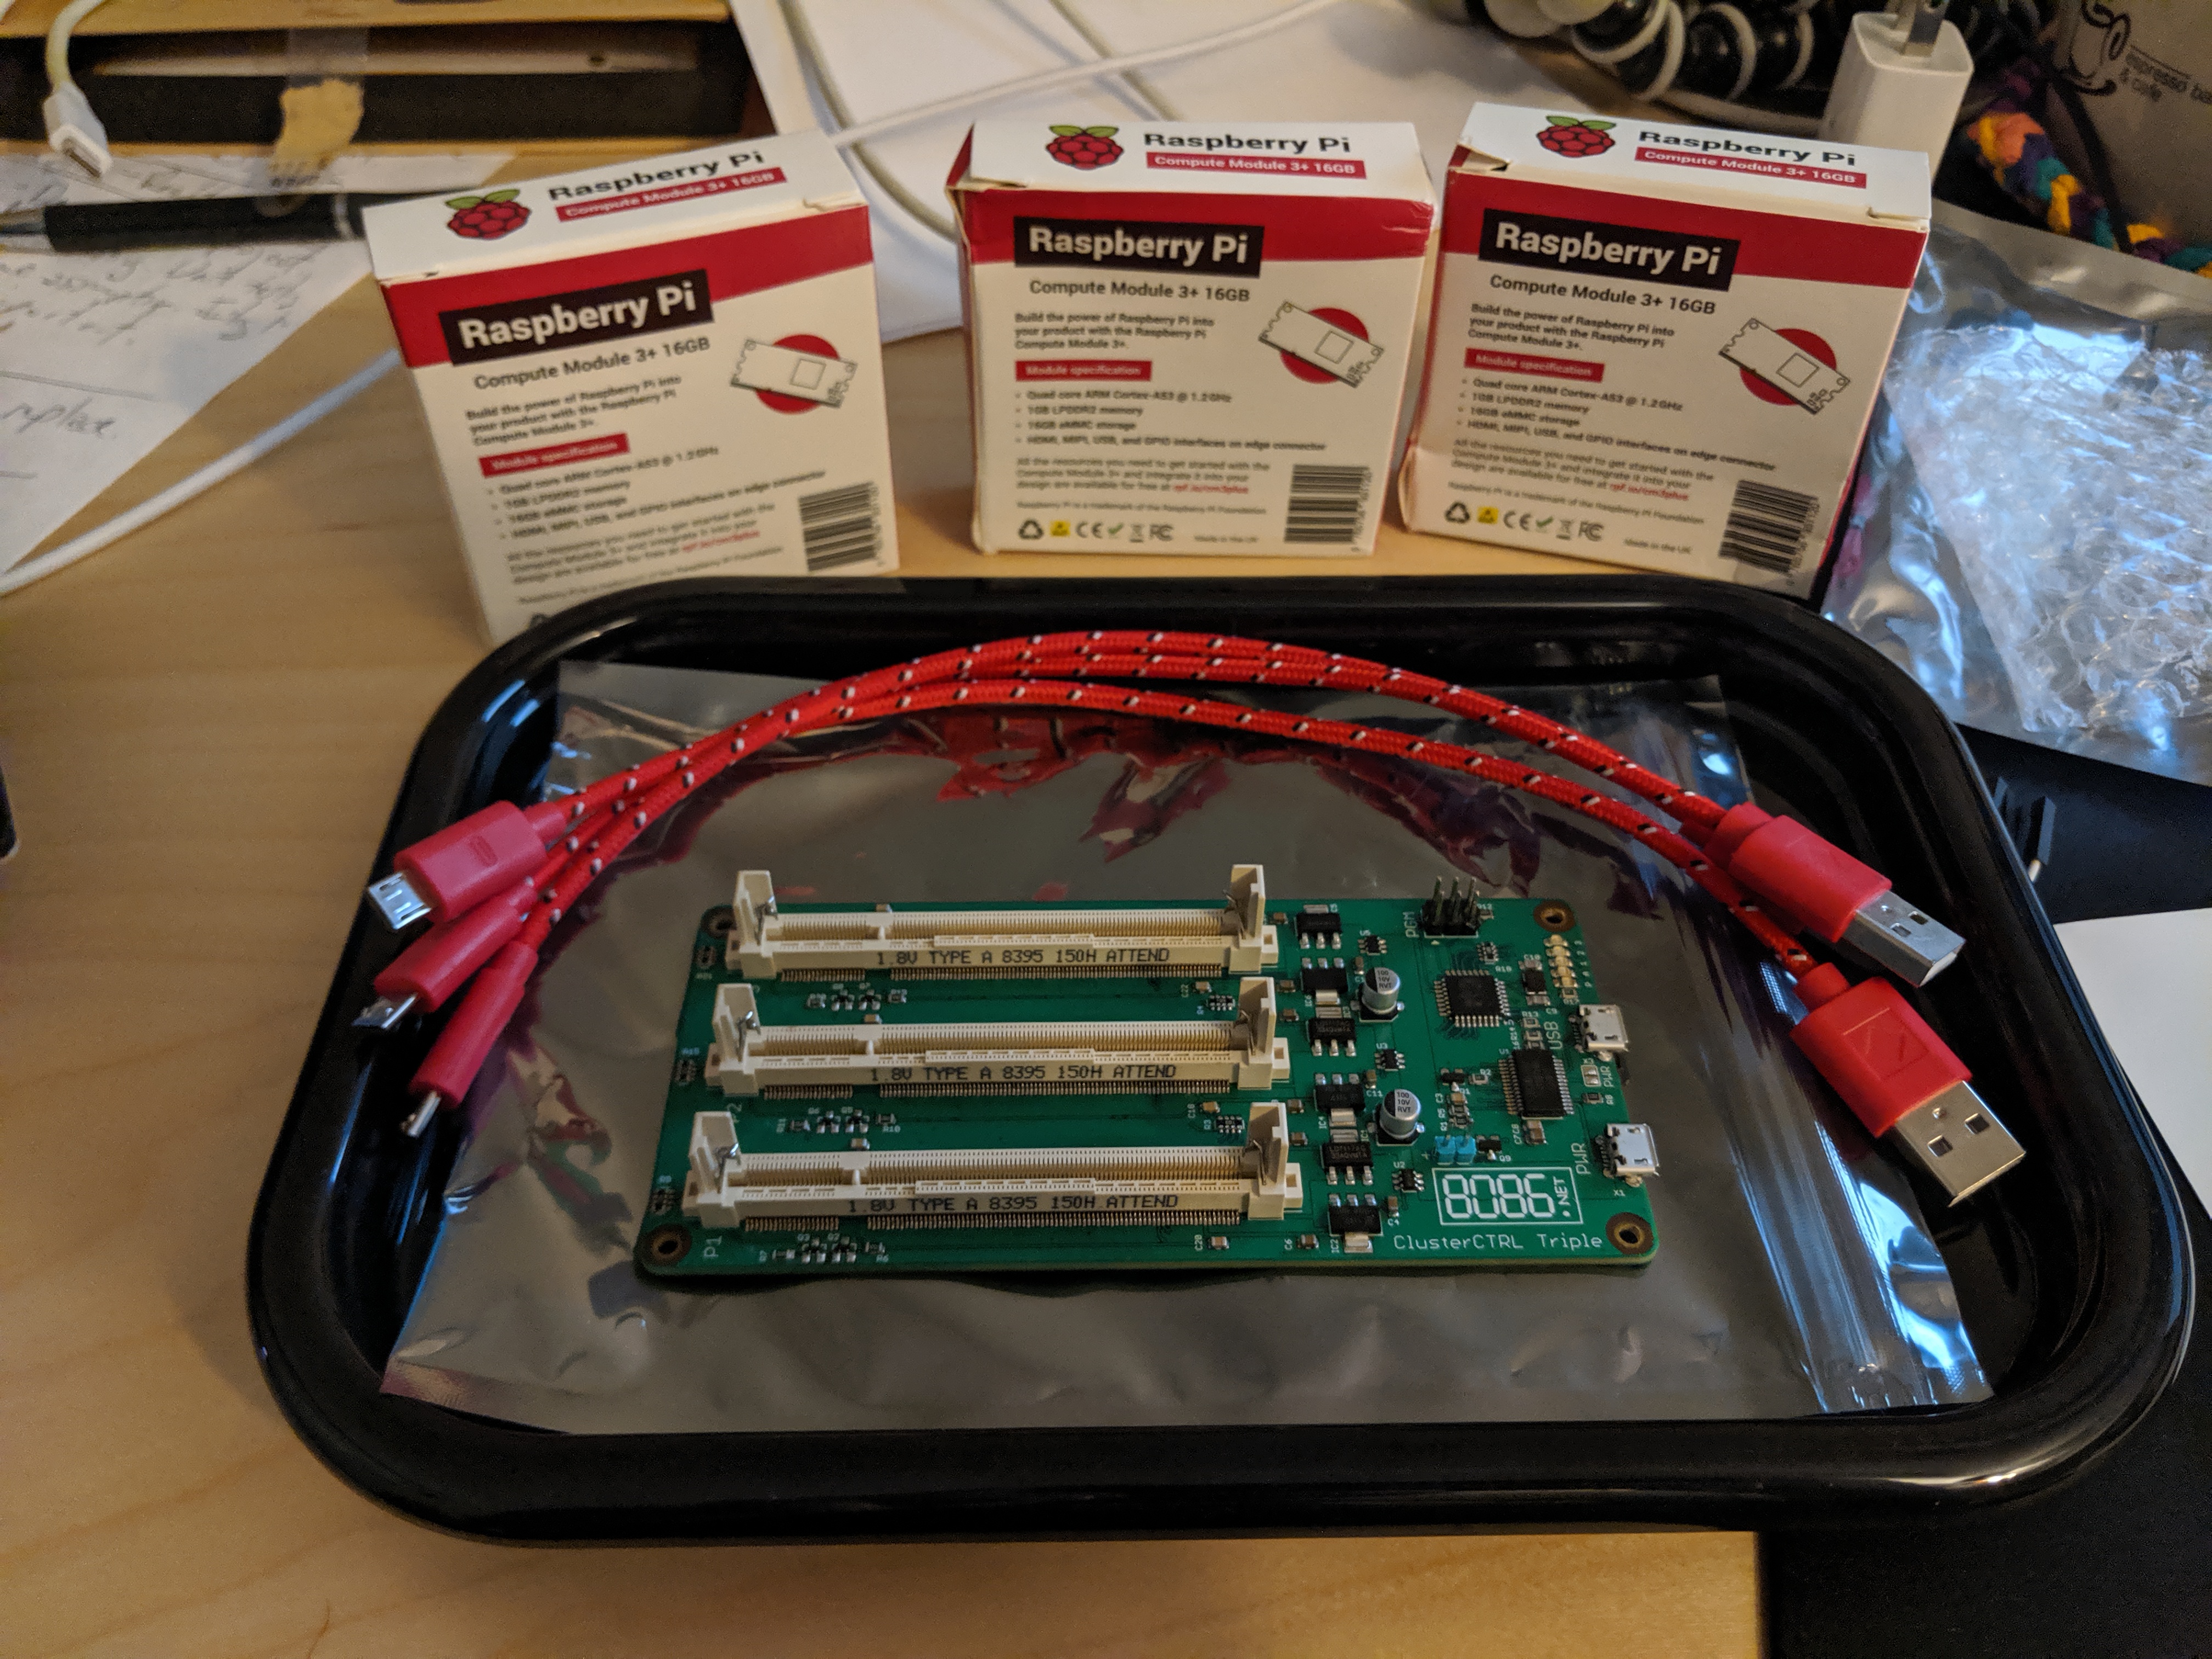
Since the original KubeHat Project was suspended, and the Pimera Project met with mixed results, I was excited to recently discover that the developer of the ClusterHAT was working on a new effort to cluster Pi Compute Modules, under the umbrella of ClusterCTRL, the first iteration of this being the Cluster Triple, of which there are a few early betas available for developers to try.
An order on Tindie for the board, and another order to PiShop.us, and lo and behold!
 )
)
The Hardware
It's easy to see the Cluster Triple as an evolution of the original Cluster HAT. The new Cluster Triple swaps out the Pi Zeros for the more expensive, but much more powerful Raspberry Pi Compute Module hardware format. Everything from the CM1 to the most recent CM3+ are compatible. Like the ClusterHAT, the node Pi devices depend on the expansion board being connected to a "controller" device, to which the nodes will be exposed via USB Gadget mode to connect virtual serial consoless, and virtual ethernet devices that can either be bridged or NAT'd to the controller's network connection.
Board Specs
- Onboard 4-port USB 2.0 hub
- ClusterCTRL (I2C) USB interface allows individual control of Pi power, fan, LED, etc.
- Programmable power on states for LED, Individual Pi Power, USBBOOT, etc.
- Unpopulated pads for ClusterCTRL UART status (for debug)
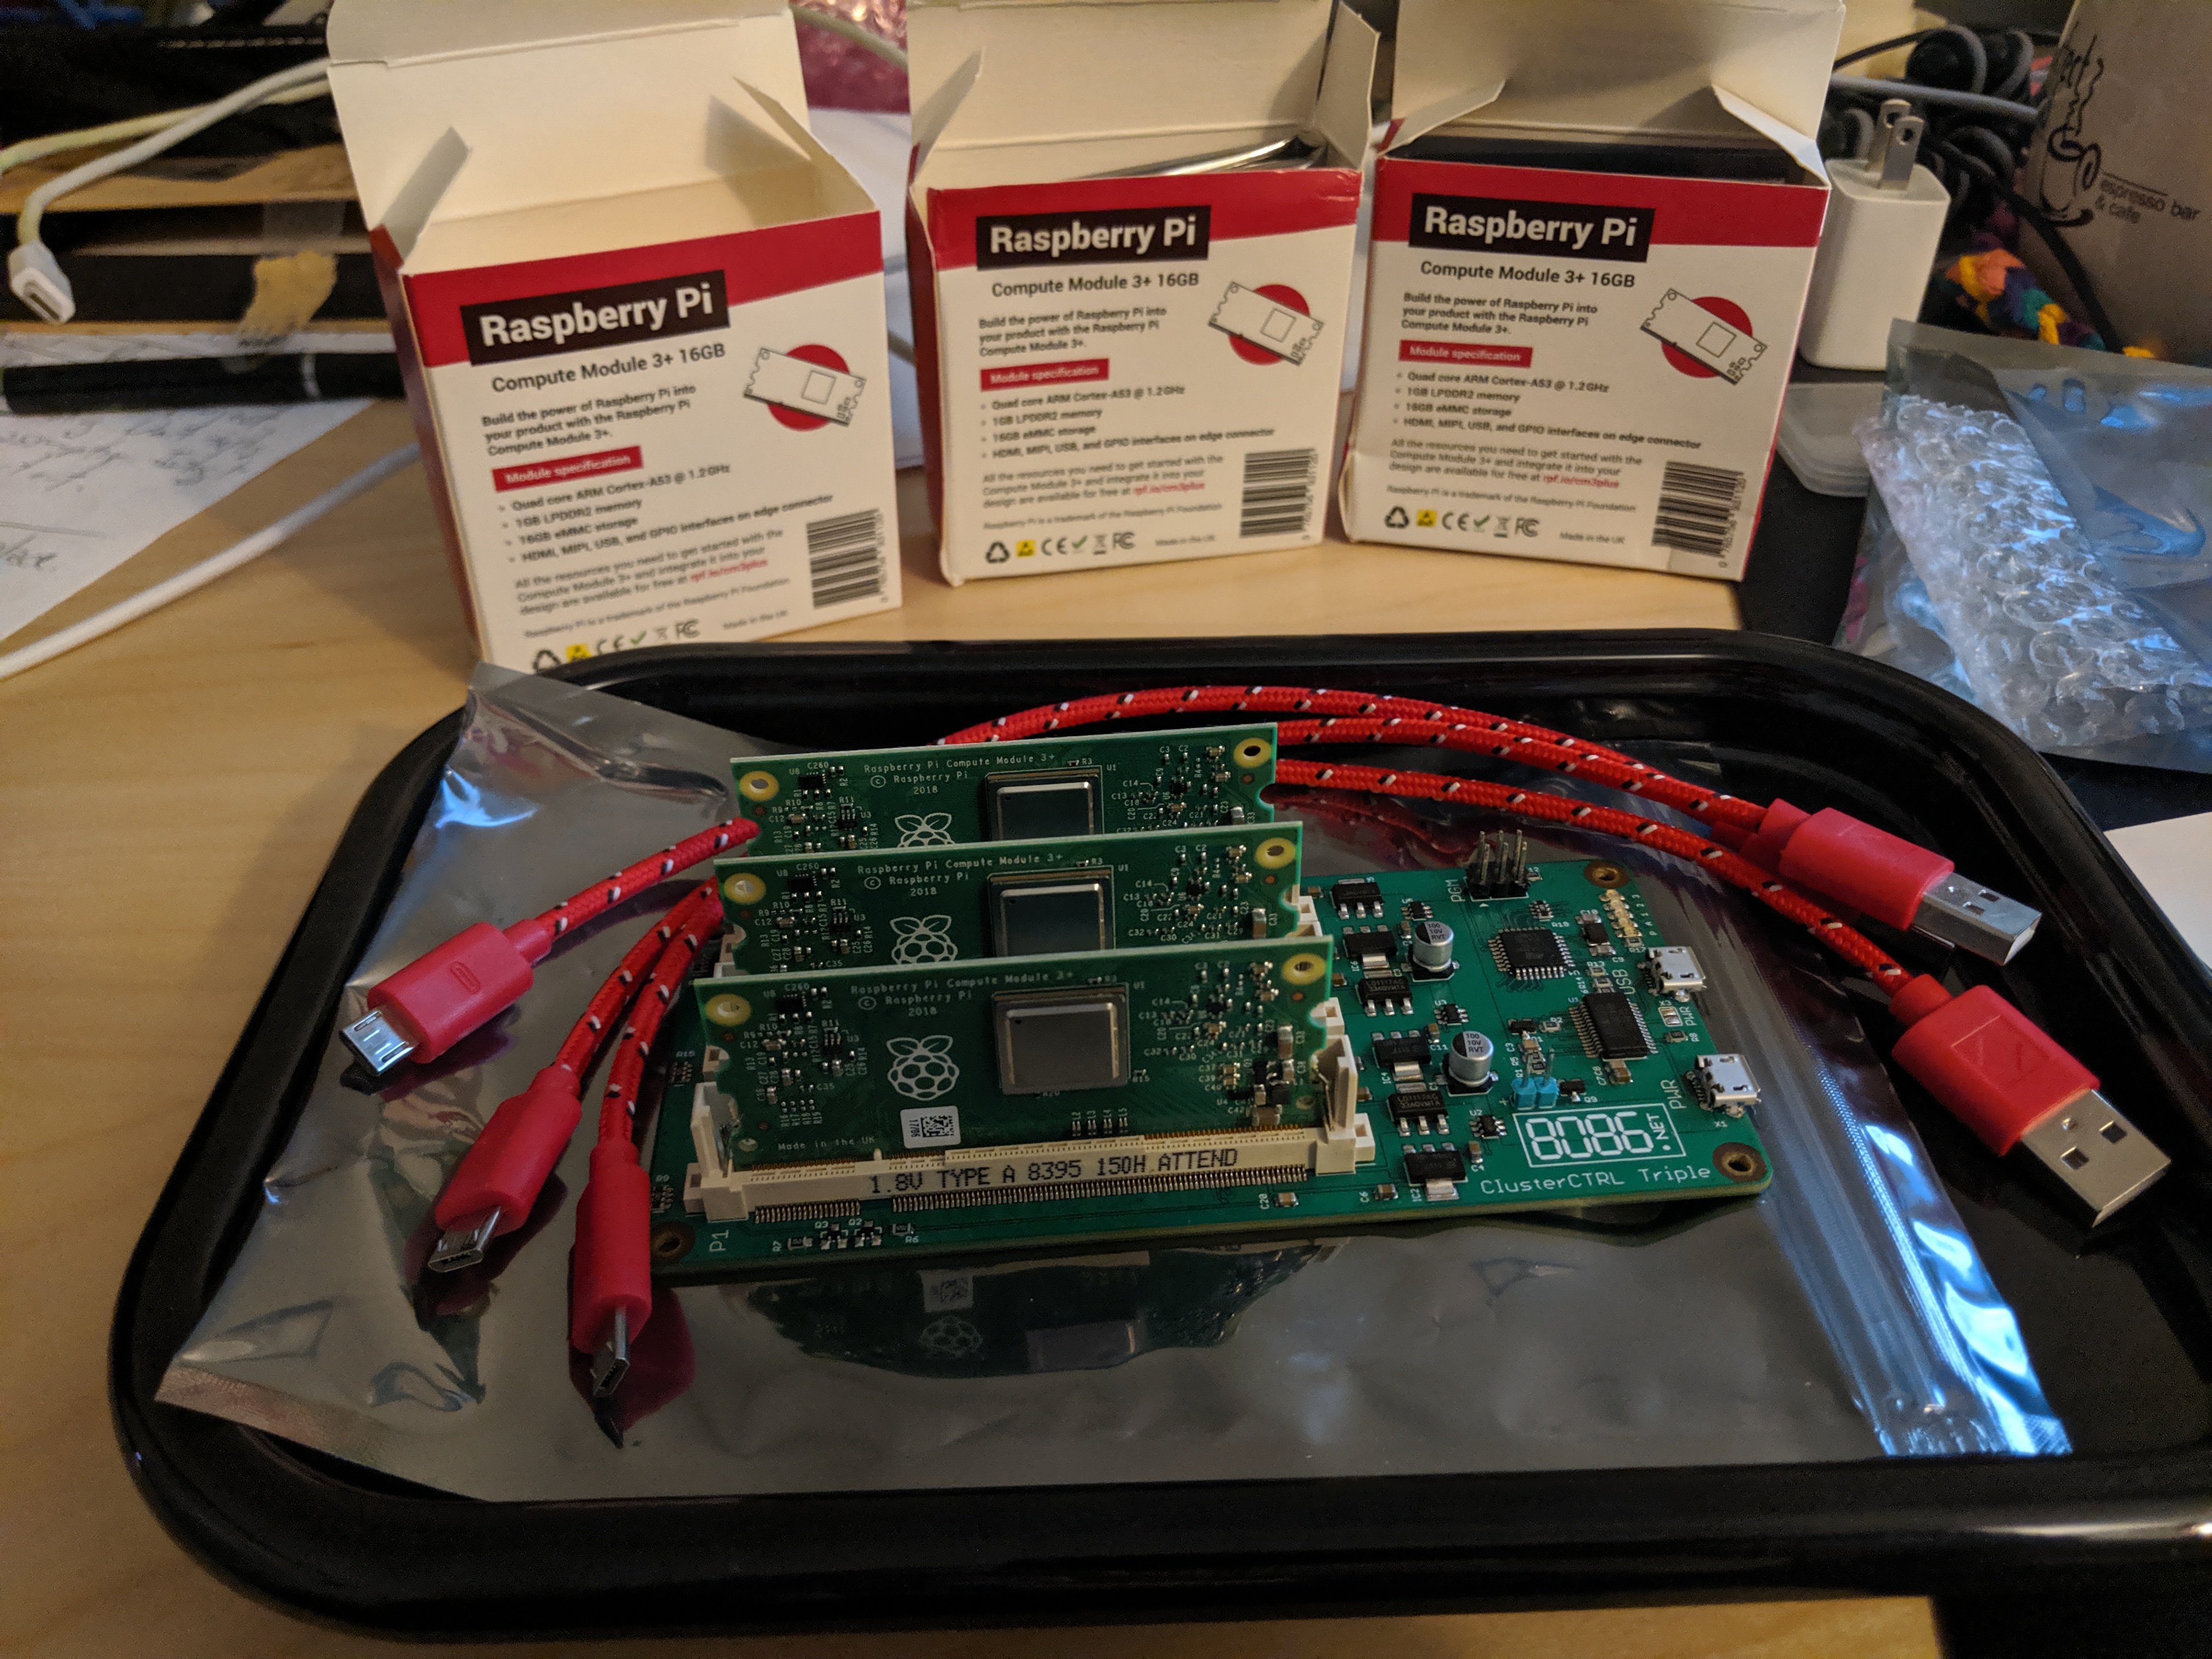
Compute Modules
I decided to go with the latest CM release, so I purchased three Compute Module 3+ boards. These boards come in Lite (no eMMC), and 8GB, 16GB, or 32GB eMMC varieties. For mine I purchased the 16GB versions.
- Broadcom BCM2837B0, Cortex-A53 (ARMv8) 64-bit SoC @ 1.2GHz
- 1GB LPDDR2 SDRAM
- 16GB eMMC Flash memory
Hardware Setup
I assembled the CMs into the Cluster Triple board, attached the provided USB cable to the controller USB port and the USB port on the board, then plugged a micro USB charger into the PWR port on board.
Software Setup
The latest Cluster Triple Raspbian images have some key variations across two axes:
- The network for the nodes can be either bridged with the controller's network interface, or the controller can use NAT, and the nodes will only have local IPs internal to the private network behind the controller.
- The CM devices can either boot using USBBOOT off the controller (with optional data storage on the eMMC flash, if not using the Lite version), or can boot off the included eMMC directly.
For my particular use case, where I want the nodes to get IPs on my local LAN so I can use Kubernetes NodePort exposing for services, etc. I am going to use the CBRIDGE images, and boot directly off the eMMC with a full OS images on each CM.
Controller OS
Since I'm using the controller itself to flash the images to the CM nodes, I grabbed the individual CBRIDGE - Lite Controller controller image from the Cluster HAT - Software Setup page.
Once you've downloaded the image, you can write it to the microSD card for the controller:
$ dd if=ClusterCTRL-2019-07-10-lite-4-CBRIDGE.img of=/dev/mmcblk0 bs=4M conv=fsync
If you need to use SSH to log into controller, you'll want to mount the boot partition and touch /boot/ssh, to ensure it comes up when the controller starts.
From there, you can add the card back to the controller, and plug in the combination of the controller Pi, and the Cluster Triple board.
Once booted, you can use the mDNS name to SSH into the bridge controller:
$ ssh pi@cbridge.local
pi@cbridge.local's password:
Linux cbridge 4.19.66-v7+ #1253 SMP Thu Aug 15 11:49:46 BST 2019 armv7l

The programs included with the Debian GNU/Linux system are free software;
the exact distribution terms for each program are described in the
individual files in /usr/share/doc/*/copyright.

Debian GNU/Linux comes with ABSOLUTELY NO WARRANTY, to the extent
permitted by applicable law.
Last login: Fri Sep  6 04:33:42 2019 from 192.168.1.86
pi@cbridge:~ $
Initial status
Once you log into the bridge controller, you can see the status of the Cluster Triple by running clusterctrl status. My controller also has the ClusterHAT still on top, so the output includes the details of that devices:
pi@cbridge$ clusterctrl status
clusterhat:1
clusterctrl:1
maxpi:7
ctrl_bus:20:3:3
hat_version:2.3
hat_version_major:2
hat_version_minor:3
hat_size:4
hat_uuid:7a840d46-de0a-44e0-9057-f949d0d5e848
hat_vendor:8086 Consultancy
hat_product_id:0x0004
throttled:0x0
hat_alert:0
hat_hub:1
hat_wp:1
hat_led:1
hat_wplink:0
hat_xra1200p:True
p1:0
p2:0
p3:0
p4:0
ctrl20:FW:1.2 ADC1:4866mV T1:12.86C
p5:0
u5:1
p6:0
u6:1
p7:0
u7:1
The key pieces are near the top:
clusterctrl:1
maxpi:7
ctrl_bus:20:3:3
And near the end:
ctrl20:FW:1.2 ADC1:4866mV T1:12.86C
p5:0
u5:1
p6:0
u6:1
p7:0
u7:1
Because of the ClusterHAT, you can see the numbering for the Cluster Triple devices starting at p5. Initially all three CMs are powered off to start (p5:0), and configured with USBBOOT enabled (u5:0)
Installing Raspbian To CMs
Because I'm running off the eMMC, I followed the guide for How to write an image to the eMMC.
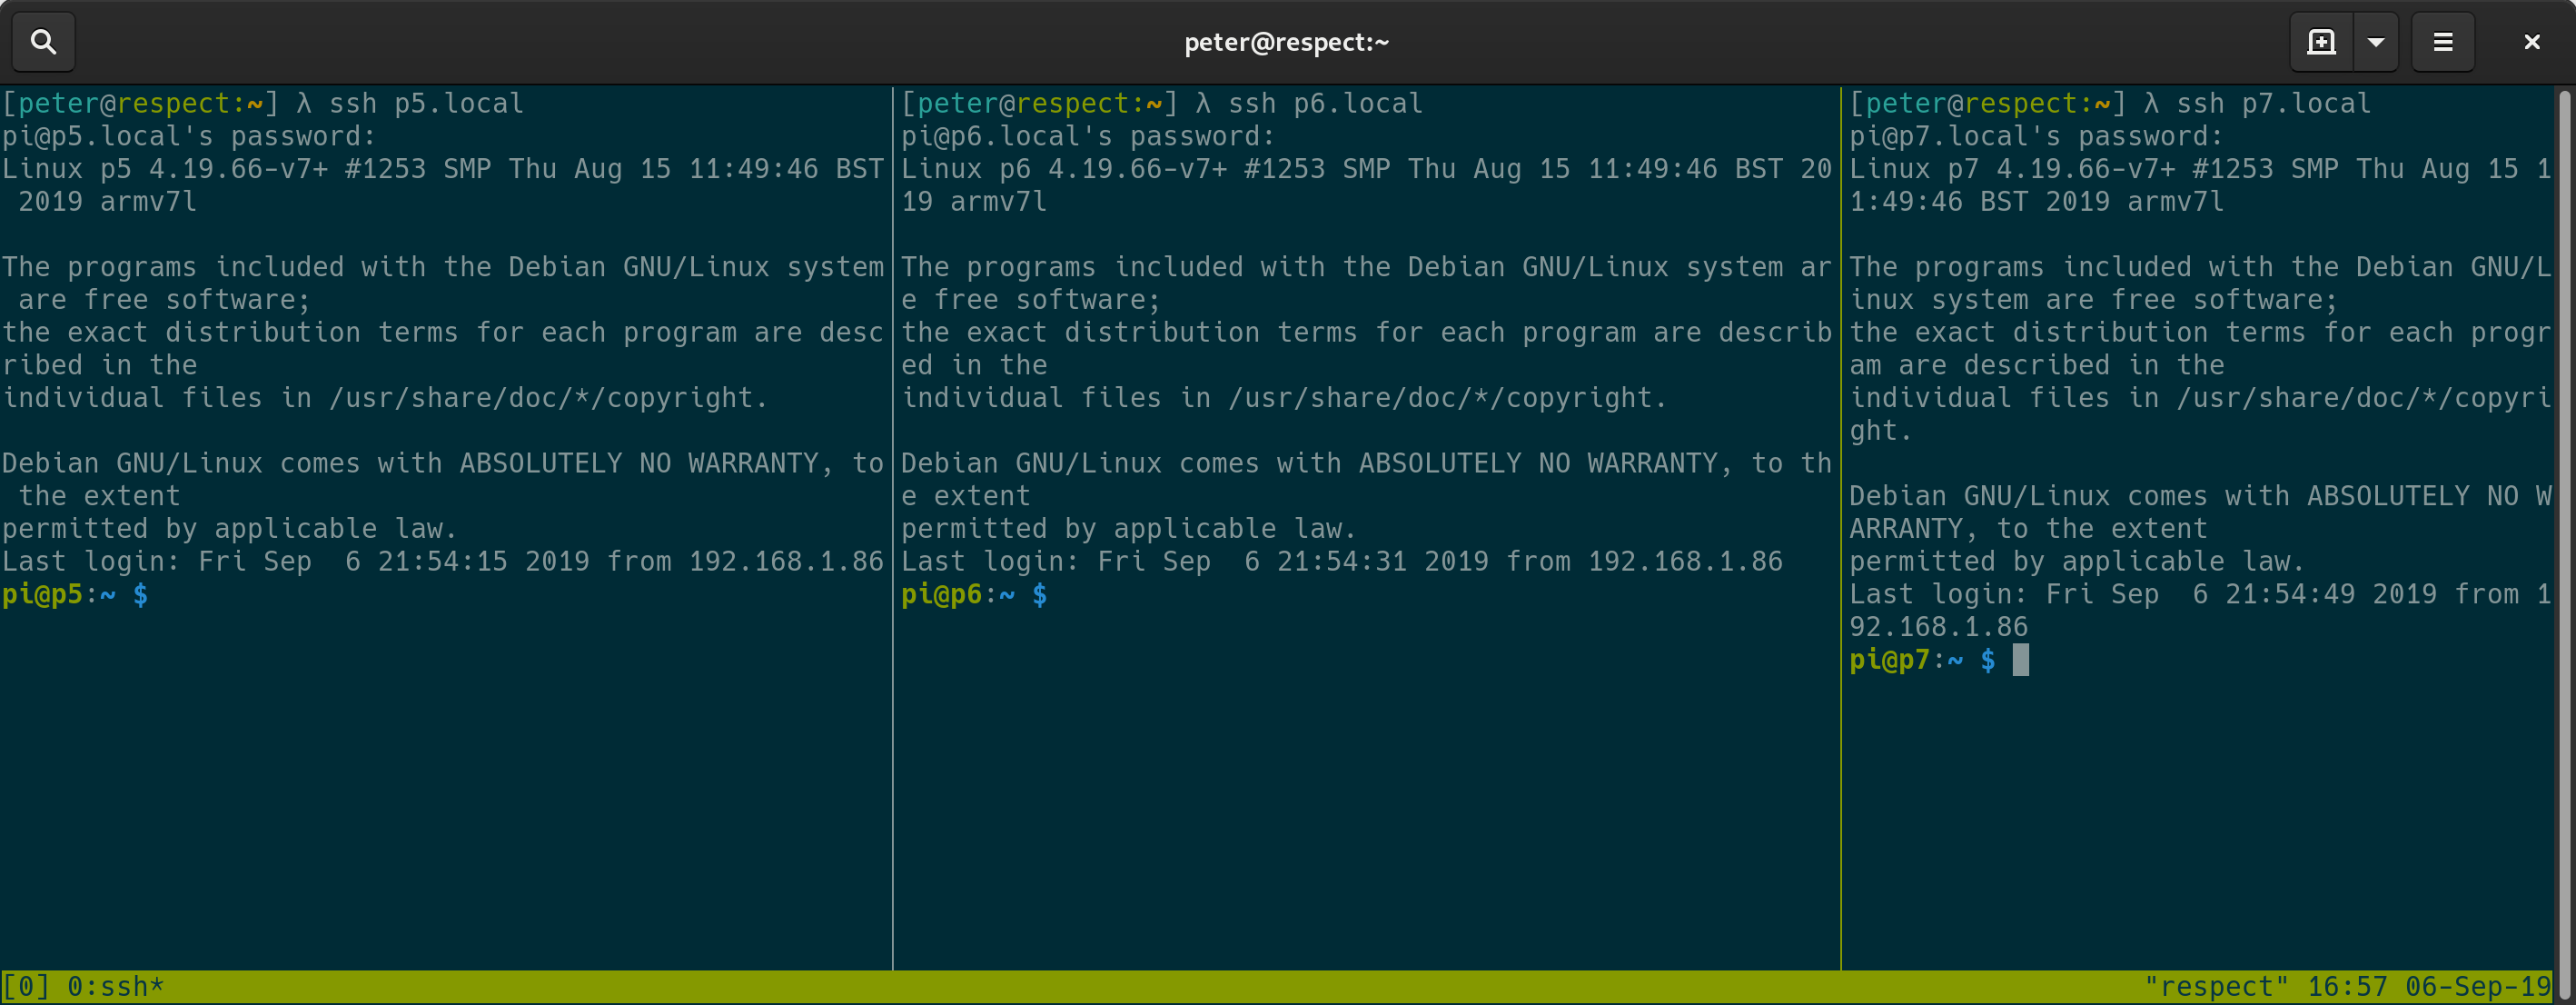
Once done downloading the P1 image and writing it to the eMMC, I can happily SSH into the nodes:
Next Steps
Next, I will be working on getting the controller node running as a Kubernetes control node, and the three CM nodes setup as Kubernetes nodes!